Enable MFA In Azure and Microsoft 365 For Service Accounts
Author: Liam Romanis (Principal Security Consultant)
When assessing Azure and Microsoft 365 configurations it is common to identify many vectors which enable users, and therefore threat actors, to make use of Legacy or Basic authentication, which do not mandate the use of Multi-Factor Authentication (MFA) and can bypass it entirely.
I am not going to cover all of attack these vectors. I will focus on just one.
It is frustratingly common to find that clients have decided to configure service accounts without any MFA. Whilst a very long and complex password may have been configured there is still a risk that threat actors will target these accounts, as there is no requirement for MFA. If the correct password is guessed or a relevant token captured, then there is nothing to stop a threat actor gaining unauthorized access. This poses a significant risk, as service accounts are often configured with enhanced roles and privileges.
So, how do we configure service accounts with MFA without interrupting normal operation to satisfy MFA requests?
In short, we first need to configure and register MFA on the service account (we don’t want a threat actor to be able to register MFA if they guess the correct password). Then, we need to identify trusted IP Addresses or Endpoints.
These can then be used to create a conditional access policy to bypass the requirement for MFA from those trusted assets. In this way, if a threat actor tries to brute force the service account from a non-trusted source, MFA would be requested if they guess the correct password.
Please note, if the subscription does not include one of the following, then conditional access policies cannot be used:
- Azure Active Directory Premium P1 or P2
- Microsoft 365 Business Premium
- Microsoft 365 E3 or E5
- Enterprise Mobility & Security E3 or E5
It is recommended that one of these subscriptions is added.
Once we have identified our trusted source assets, we need to configure those as Trusted IPs:
1. Log in to portal.azure.com using your Global Administrator credentials or an account with sufficient read and write access.
2. Select ‘Azure Active Directory’ under Azure services.
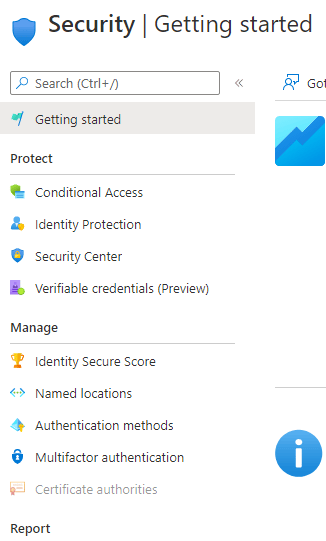
3. Choose ‘Security’ which can be found in the left-hand menu.
4. Select ‘Multifactor Authentication’ under the ‘Manage Category’ in the lefthand menu.

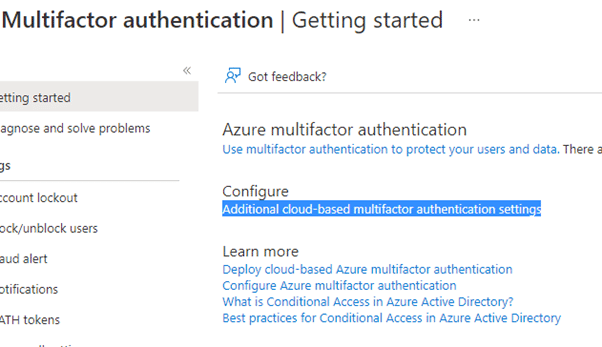
5. Choose the ‘Additional cloud-based MFA settings’ option.

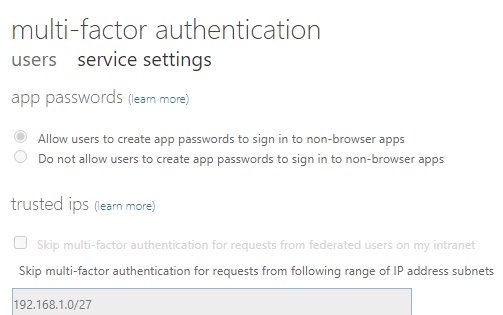
6. In the new dialogue, navigate to the trusted IPs section.
7. Select the ‘Skip multi-factor authentication for requests from federated users on my intranet’ option.
8. In the text box, enter the trusted IP.

9. Then Select Save.
Now that the trusted assess has been configured we need to create a conditional access policy to enforce MFA and exclude our service account to bypass MFA if the source of the authentication is the trusted asset.
1. Log in to portal.azure.com using your Global Administrator credentials or an account with sufficient Read and Write privileges.
2. Select ‘Azure Active Directory’ under Azure services.
3. Choose ‘Security’ from the lefthand menu.
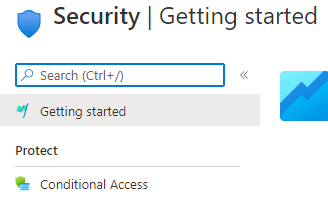
4. Select ‘Conditional Access’ under the Protect category in the left pane.

5. Select ‘Conditional Access’
6. Select ‘New Policy’.
7. Provide a name for the policy.
8. Select the ‘Users’ and groups option.
9. Select the ‘Exclude’ tab.
10. Select the ‘Users and groups check box’ and choose the service account that MFA should not be enforced.
11. Select each service account.
12. Navigate to the Access controls section, select Grant.
13. Select the ‘Grant access’ radio button and the ‘Require multi-factor authentication’ check box.
14. Click ‘Select’.
15. Then Create and Save.
source https://www.rootshellsecurity.net/enable-mfa-in-azure-and-microsoft-365-for-service-accounts/
Comments
Post a Comment